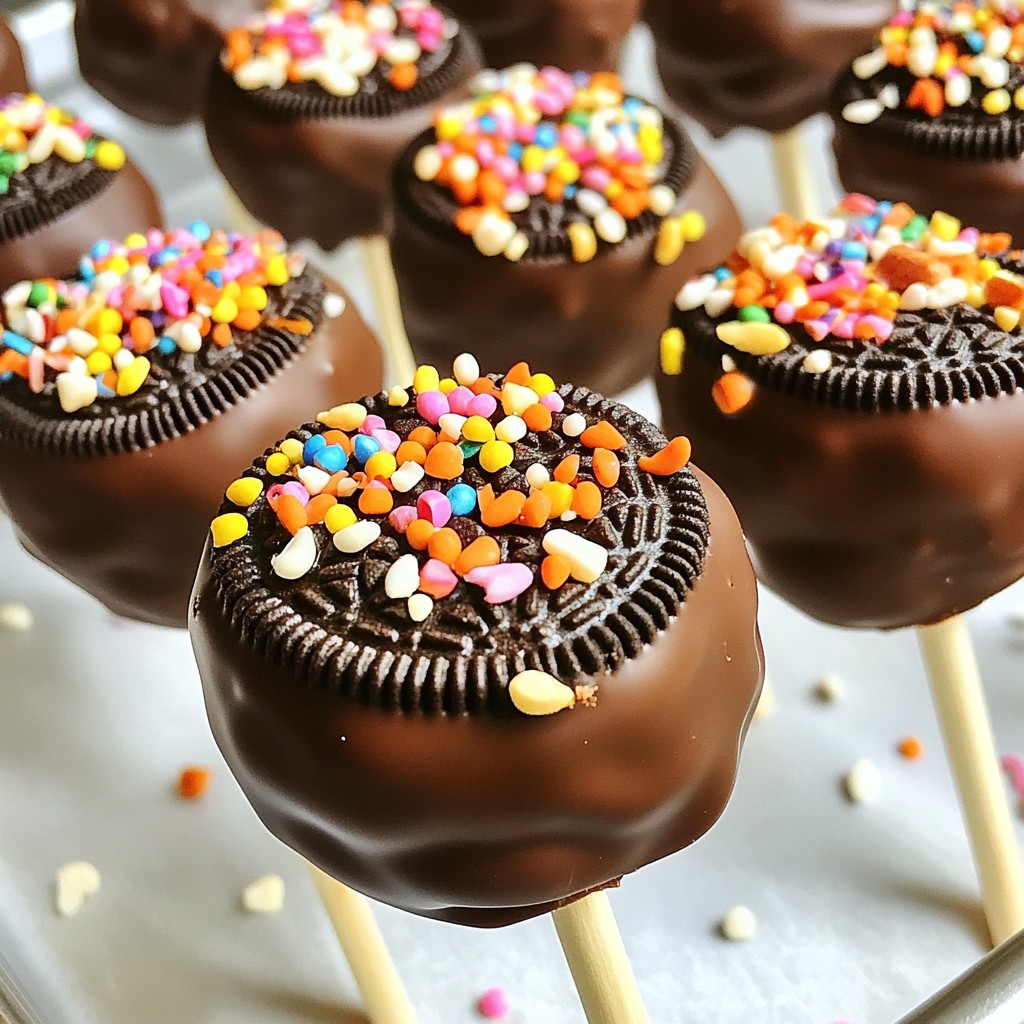
Are you ready for a delicious treat that's easy and fun to make? Chocolate Covered Oreo Pops are a hit for kids and adults alike! In this post, I’ll share quick steps, exciting flavor options, and tips to make your Oreo pops shine. You'll love how simple it is to create tasty treats for any occasion. Let’s dive into the world of sweet snacks that are sure to impress!
Why I Love This Recipe
- Easy to Make: This recipe is quick and requires minimal ingredients, making it perfect for a last-minute treat.
- Fun for All Ages: Kids and adults alike enjoy dipping and decorating their own Oreo pops, making it a fun activity.
- Customizable: You can easily switch up the toppings and chocolate types to suit your taste preferences.
- Perfect for Any Occasion: These Oreo pops are great for parties, holidays, or just a sweet snack at home!
Ingredients
Essential Ingredients for Oreo Pops
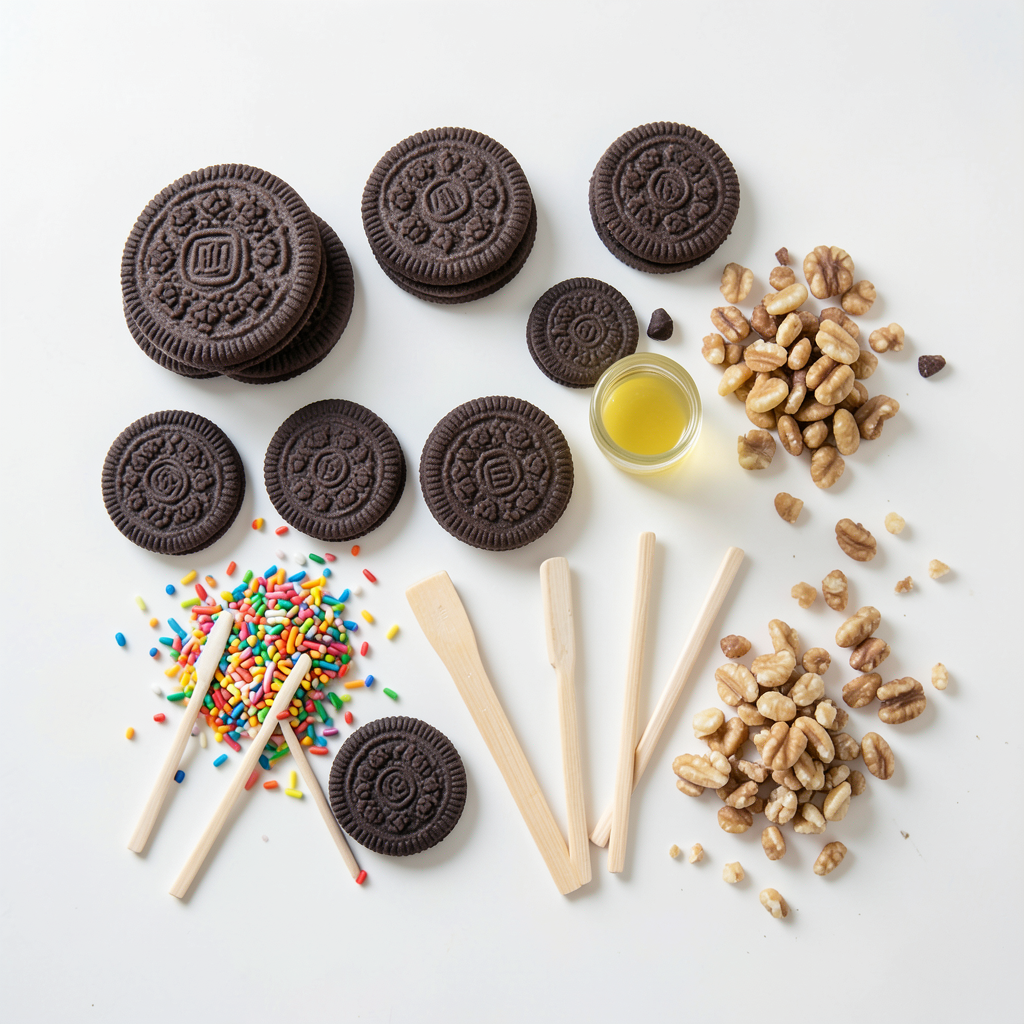
To make delightful Oreo pops, you need:
- 12 Oreo cookies
- 1 cup semi-sweet chocolate chips
- 2 tablespoons coconut oil (or vegetable shortening)
- 12 lollipop sticks
These are the core items that give your pops that classic taste and fun shape.
Optional Ingredients to Enhance Flavor
To make your Oreo pops even better, consider adding:
- 1/4 cup colorful sprinkles
- 1/2 cup crushed nuts
Sprinkles add color and fun. Crushed nuts give a crunchy texture, making each bite exciting.
Necessary Equipment
You will need a few handy tools for this fun project:
- Microwave-safe bowl
- Baking sheet
- Parchment paper
These items help you melt the chocolate and keep things tidy. Using parchment paper makes cleanup easier and prevents sticking.
Step-by-Step Instructions
Preparing the Oreo Cookies
First, take your Oreo cookies. Carefully push a lollipop stick into the cream filling of each cookie. Insert it halfway so it stays in place. Next, line a baking sheet with parchment paper. Arrange the cookies on the sheet. Make sure to leave space between each cookie. This will help when you dip them later.
Melting the Chocolate: Tips for Success
Grab a microwave-safe bowl. Add the semi-sweet chocolate chips and coconut oil. Heat this mix in your microwave. Set it for 30 seconds first. After 30 seconds, stir the chocolate. Keep heating and stirring until the chocolate melts. You want it to be smooth and shiny. If it gets too thick, you can add a bit more coconut oil. This will keep it easy to dip.
Dipping and Coating the Oreos
Now comes the fun part! Take each Oreo pop and dip it into the melted chocolate. Make sure to coat it fully. Gently tap the stick against the bowl's edge. This helps remove extra chocolate. It gives a nice, smooth finish. Before the chocolate hardens, sprinkle on colorful sprinkles or crushed nuts. Place the dipped Oreos back on the baking sheet. Let them sit at room temperature to set. You can also chill them in the fridge for 10-15 minutes to speed things up. Once the chocolate is hard, your Oreo pops are ready to enjoy!
Tips & Tricks
Achieving a Smooth Chocolate Coating
To get a smooth chocolate coat, use high-quality chocolate chips. Mixing in coconut oil helps too. Melt the chocolate in short bursts. Stir well after each time. This keeps the chocolate smooth and shiny. When dipping, work fast. Tap the stick gently to let extra chocolate drip off. This makes for a clean finish.
Creative Decoration Ideas for Oreo Pops
Add fun toppings to your Oreo pops. Colorful sprinkles make them pop! You can also use crushed nuts for a tasty crunch. Try mini chocolate chips or shredded coconut too. If it fits the theme, drizzle white chocolate on top. Get creative! Use festive colors for holidays to make them more special.
How to Avoid Common Mistakes
Avoid common issues by sticking to a few key steps. Make sure the cookies are cold before dipping. This helps the chocolate set faster. Don’t rush the melting process; go slow. If the chocolate cools too much, it won't coat well. Always let the pops sit on parchment paper. This keeps them from sticking, ensuring a perfect treat.
Pro Tips
- Chill the Chocolate: For a smoother coating, make sure your melted chocolate is at the right temperature. If it’s too hot, it may not set well on the cookies.
- Experiment with Flavors: Try using white chocolate or milk chocolate for different flavor profiles. You can also add a few drops of peppermint extract for a minty twist!
- Make Them Ahead: These Oreo pops can be made in advance and stored in an airtight container in the refrigerator for up to a week, making them perfect for parties!
- Creative Decorations: In addition to sprinkles and nuts, consider using crushed candies or edible glitter to make your pops even more festive and visually appealing!
Variations
Flavor Options: White Chocolate vs. Dark Chocolate
You can switch up the chocolate for your Oreo pops. Dark chocolate gives a rich taste. It pairs well with the sweet cream of the Oreo. White chocolate is sweeter and creamier. It adds a fun contrast to the cookie. Use either type based on your taste. You can even mix them for a cool look. Half of each pop can be one flavor. This makes them look fancy and fun.
Fun Toppings to Try: Nuts, Sprinkles, and More
Toppings can make your Oreo pops unique. Colorful sprinkles add a festive touch. They bring a pop of color and crunch. You can also use crushed nuts. They add a nice texture and flavor. Try using different nut types like almonds or peanuts. For a twist, use crushed candies or cookies. Get creative and use what you love. The more toppings, the more fun your pops will be!
Themed Oreo Pops for Special Occasions
You can make themed Oreo pops for any event. For Halloween, use orange and black sprinkles. For birthdays, use colorful sprinkles and fun shapes. You can even dip them in colored chocolate. This adds an extra layer of fun. Think about the occasion and match the colors. You can make them for holidays like Christmas too. Use red and green sprinkles or drizzle. Themed Oreo pops are a great way to celebrate!
Storage Info
Best Practices for Storing Oreo Pops
To keep your chocolate covered Oreo pops fresh, store them in an airtight container. Place a piece of parchment paper between layers if you stack them. This helps avoid sticking. Keep your container in a cool, dry place. Avoid direct sunlight as it can melt the chocolate. If you have a warm kitchen, use the fridge. However, don’t freeze them just yet.
How Long Do Chocolate Covered Oreo Pops Last?
Chocolate covered Oreo pops can last up to one week when stored correctly. After that, the chocolate may lose its shine. The cookies inside can also become stale. For the best taste, enjoy them within the first few days. If you see any signs of mold or change in texture, it's best to throw them away.
Freezing Oreo Pops: Is It Possible?
Yes, you can freeze Oreo pops! To freeze, wrap each pop in plastic wrap. Place them in a freezer-safe bag or container. They can last up to three months in the freezer. When you're ready to enjoy them, remove them and let them thaw in the fridge. This keeps the chocolate from sweating and losing its texture.
FAQs
How do I make chocolate-covered Oreo pops without chocolate chips?
You can use melted chocolate bars instead of chocolate chips. Just chop the bar into small pieces. Then, melt it in the microwave like you would with chocolate chips. Add a little coconut oil for a smooth finish. This method works well and tastes great!
Can I use different types of cookies for this recipe?
Yes, you can! Try using vanilla cookies, peanut butter cookies, or even ginger snaps. Each cookie brings its own flavor. Just make sure the cookies are sturdy enough to hold the lollipop stick.
Where can I buy pre-made chocolate-covered Oreo pops?
You can find them in stores like Walmart or specialty candy shops. Online, sites like Amazon offer various brands. Check local bakeries too; they might have their own versions of these tasty treats.
What are some alternative dipping options for Oreo pops?
You can dip them in white chocolate, yogurt coating, or even candy melts. Each option adds a unique flavor and color. Try out different toppings like crushed cookies, nuts, or even coconut for a twist!
Oreo pops are fun and easy to make. We covered essential ingredients, tips, and storage. You can use chocolate, toppings, and even different cookies. Remember to follow the steps for a smooth finish. Experiment with flavors for unique treats. With these simple ideas, you can impress friends or celebrate special days. Enjoy creating your tasty Oreo pops and share your joy!