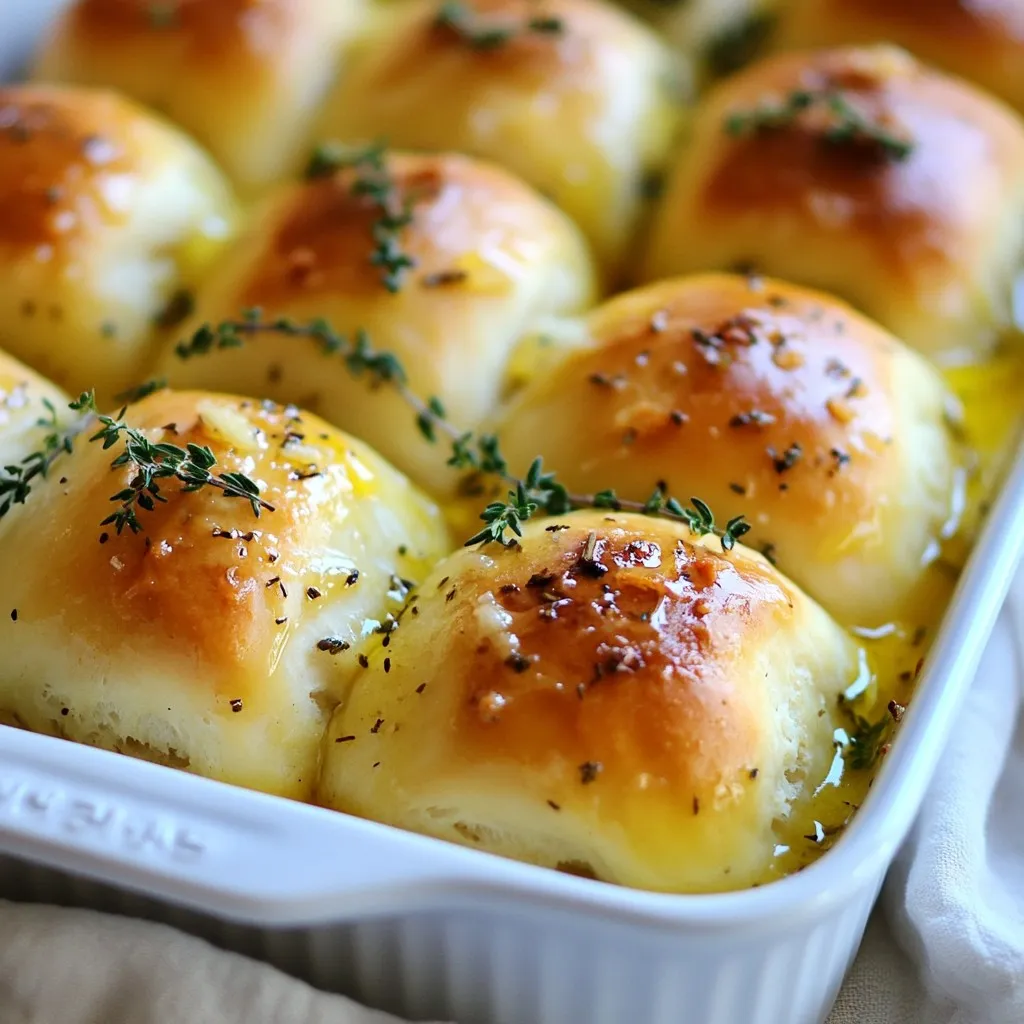
Welcome to your new favorite bread recipe! Garlic Herb Butter Dinner Rolls are warm, soft, and bursting with flavor. These rolls are perfect for any meal or just for snacking. I’ll guide you through every step, from mixing the dough to baking golden perfection. Grab your apron, and let’s get started on these mouthwatering rolls that will make your kitchen smell heavenly!
Why I Love This Recipe
- Flavorful Garlic Infusion: The combination of garlic, fresh herbs, and buttery goodness creates a delightful aroma and taste that elevates any meal.
- Soft and Fluffy Texture: These rolls come out perfectly soft and fluffy, making them an irresistible addition to any dinner table.
- Perfect for Sharing: With 12 rolls, they are ideal for gatherings, ensuring everyone can enjoy a warm, homemade treat.
- Easy to Make: Despite their gourmet appeal, these rolls are simple to prepare, making them a great choice for both novice and experienced bakers.
Ingredients
List of Ingredients
To make garlic herb butter dinner rolls, you will need:
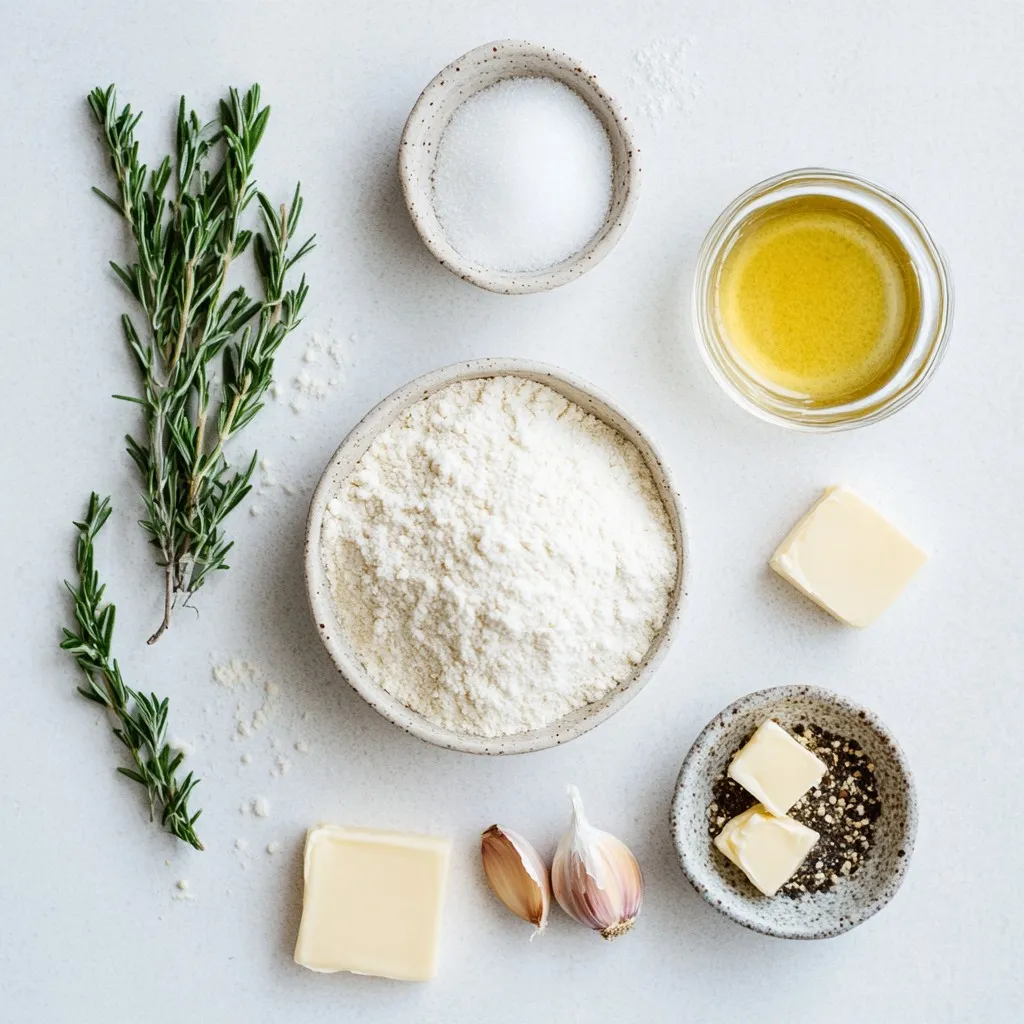
– 4 cups all-purpose flour
– 2 tablespoons granulated sugar
– 2 teaspoons fine salt
– 1 packet (2¼ teaspoons) instant yeast
– 1¾ cups warm water (about 110°F/45°C)
– 4 tablespoons unsalted butter, melted, plus extra for brushing
– 4 cloves garlic, finely minced
– 1 tablespoon fresh rosemary, finely chopped
– 1 tablespoon fresh thyme, finely chopped
– ½ teaspoon freshly ground black pepper
Optional Garnishes
For a nice touch, consider these garnishes:
– A sprig of fresh rosemary
– A sprinkle of coarse sea salt
– A drizzle of olive oil
Tools Needed
Here is a list of tools to help you make these rolls:
– Large mixing bowl
– Wooden spoon or spatula
– Clean cloth
– 9×13 inch baking dish
– Measuring cups and spoons
– Baking sheet
– Oven mitts
Step-by-Step Instructions
Activating the Yeast
Start by pouring warm water into a large bowl. The water should be about 110°F, or warm to the touch. Sprinkle the sugar and yeast over the water. Let it rest for 5 minutes. You’ll see bubbles form. This means your yeast is alive and ready to work.
Mixing the Dough
Next, add the flour and salt to the yeast mix. Use a wooden spoon or spatula to stir the mixture. Keep mixing until the dough starts to come together. It should look shaggy but not too wet.
Kneading Process
Turn the dough onto a floured surface. Use your hands to knead it for 8 to 10 minutes. Push it with your palms and fold it over. You want the dough to feel smooth and elastic when done. This is key for fluffy rolls.
First Rise
Shape the kneaded dough into a ball. Place it in a greased bowl. Cover this bowl with a damp cloth. Let it rise in a warm area for about 1 hour. The dough should double in size during this time.
Shaping the Rolls
After the first rise, gently punch down the dough to release air. Transfer it to a floured surface and divide it into 12 equal pieces. Roll each piece into a ball. Make sure they are smooth and tight.
Second Rise
Place the dough balls close together in a greased 9×13 inch dish. They should touch but not be crowded. In a small bowl, mix melted butter, garlic, rosemary, thyme, and black pepper. Brush half of this mixture over the rolls. Cover them again and let them rise for another 30 to 45 minutes until they look puffy.
Baking Instructions
Preheat your oven to 375°F. After the second rise, brush the remaining butter mixture over the rolls. Bake them for 20 to 25 minutes. They should be golden brown and smell amazing. For a glossy finish, brush them with more melted butter as soon as they come out. Enjoy your warm, garlic herb butter dinner rolls!
Tips & Tricks
Getting the Perfect Dough Consistency
To get the right dough, start with warm water. Use a thermometer to check the temperature. It should be around 110°F (45°C). Add the yeast and sugar to the water. Let it sit for about five minutes. You want it to be frothy. This shows the yeast is awake. When mixing in the flour, add it slowly. If the dough feels too sticky, sprinkle in a bit more flour. If it’s too dry, add a tiny bit of water. You want the dough to be smooth and elastic.
Troubleshooting Yeast Issues
If your dough does not rise, check the yeast. It may be old or inactive. Always store yeast in a cool, dry place. Test your yeast before using it. Add a spoonful of sugar to warm water with the yeast. If it bubbles, it’s good. If not, you need new yeast. Also, ensure your rising area is warm. A cold kitchen can slow down yeast activity.
Enhancements for Flavor
To boost the flavor of your rolls, think about adding more herbs. Fresh herbs like parsley or basil can work well. You can also mix in grated cheese for a cheesy twist. Try adding a pinch of red pepper flakes for heat. For a sweet touch, mix in a bit of honey or maple syrup in the dough. These small changes can make your rolls unique.
Making Ahead Tips
You can prepare the dough ahead of time. After kneading, let it rise. When it doubles, punch it down, then shape the rolls. Place them in the baking dish, cover, and refrigerate overnight. When you’re ready, let them rise again for about 30 minutes before baking. This saves time on busy days. You can also freeze baked rolls. Just let them cool, then wrap them tightly. They can last up to three months in the freezer.
Pro Tips
- Use Fresh Herbs: Fresh herbs like rosemary and thyme will provide a more vibrant flavor compared to dried. Always opt for fresh whenever possible for the best taste.
- Check Your Yeast: Ensure your yeast is fresh and active by proofing it in warm water with sugar. If it doesn’t bubble after 5-10 minutes, it may be expired.
- Knead Properly: Kneading the dough until it’s smooth and elastic is key to achieving the right texture. Don’t rush this step; it develops the gluten needed for fluffy rolls.
- Enhance the Flavor: Brushing the rolls with melted butter right after baking adds a beautiful shine and extra flavor. Feel free to infuse the butter with more herbs or garlic for an added kick.
Variations
Cheesy Garlic Herb Butter Dinner Rolls
You can add cheese for a tasty twist. Try using shredded mozzarella or cheddar. Simply mix the cheese into the dough before the first rise. You can also sprinkle cheese on top before baking. This adds a nice, melty layer to your rolls.
Whole Wheat Garlic Herb Rolls
For a healthier option, swap out some of the all-purpose flour. Use half whole wheat flour and half all-purpose flour. This change gives the rolls a nutty flavor and a denser texture. You may need to add a bit more water for the right dough consistency.
Gluten-Free Option
If you need gluten-free rolls, use a gluten-free all-purpose flour blend. Make sure the blend has xanthan gum, as it helps with the texture. Keep an eye on the dough since gluten-free dough can behave differently. You may also need to adjust the water amount slightly to get the right feel.
Storage Info
How to Store Leftover Rolls
To keep your leftover rolls fresh, allow them to cool first. Place them in an airtight container. You can also wrap them in plastic wrap or foil. Store the container at room temperature for up to three days. If you want to keep them longer, use the freezer.
Freezing Instructions
To freeze your garlic herb butter dinner rolls, wait until they cool completely. Place the rolls in a single layer on a baking sheet. Freeze them for about an hour. Once frozen, transfer the rolls to a freezer bag. They can last up to three months in the freezer. Make sure to label the bag with the date.
Reheating Recommendations
To reheat your rolls, preheat your oven to 350°F (175°C). Place the rolls on a baking sheet. Cover them with foil to prevent drying. Heat for about 10-15 minutes or until warm. If you want a crispy top, remove the foil for the last few minutes. Enjoy your soft and warm rolls!
FAQs
Can I use active dry yeast instead of instant yeast?
Yes, you can use active dry yeast. Just dissolve it in warm water first. Let it sit for about 5 minutes until it gets frothy. This step wakes up the yeast.
How can I make these rolls ahead of time?
You can prepare the dough a day before. After kneading, place it in the fridge. The next day, let it rise at room temp. Then, shape, second rise, and bake.
What dishes pair well with garlic herb butter dinner rolls?
These rolls go great with soups and stews. Try them with pasta dishes or salads. They also complement grilled meats and roasted veggies.
Can I substitute the herbs in the recipe?
Absolutely! Feel free to use your favorite herbs. Basil, parsley, or oregano work well. Just keep the amounts similar to maintain flavor balance.
How do I know when the rolls are fully baked?
The rolls should be golden brown on top. Tap the bottom; it should sound hollow. If you have a thermometer, aim for 190°F (88°C) inside.
You’ve learned all the steps to make delicious dinner rolls, from the ingredients to the baking. We covered how to activate the yeast, mix and knead the dough, and create soft rolls. Remember, tips on dough consistency and flavor enhance your recipe. You can try variations like cheesy garlic herb rolls or a gluten-free option too.
With proper storage, your rolls will stay fresh and tasty. Enjoy your bakin