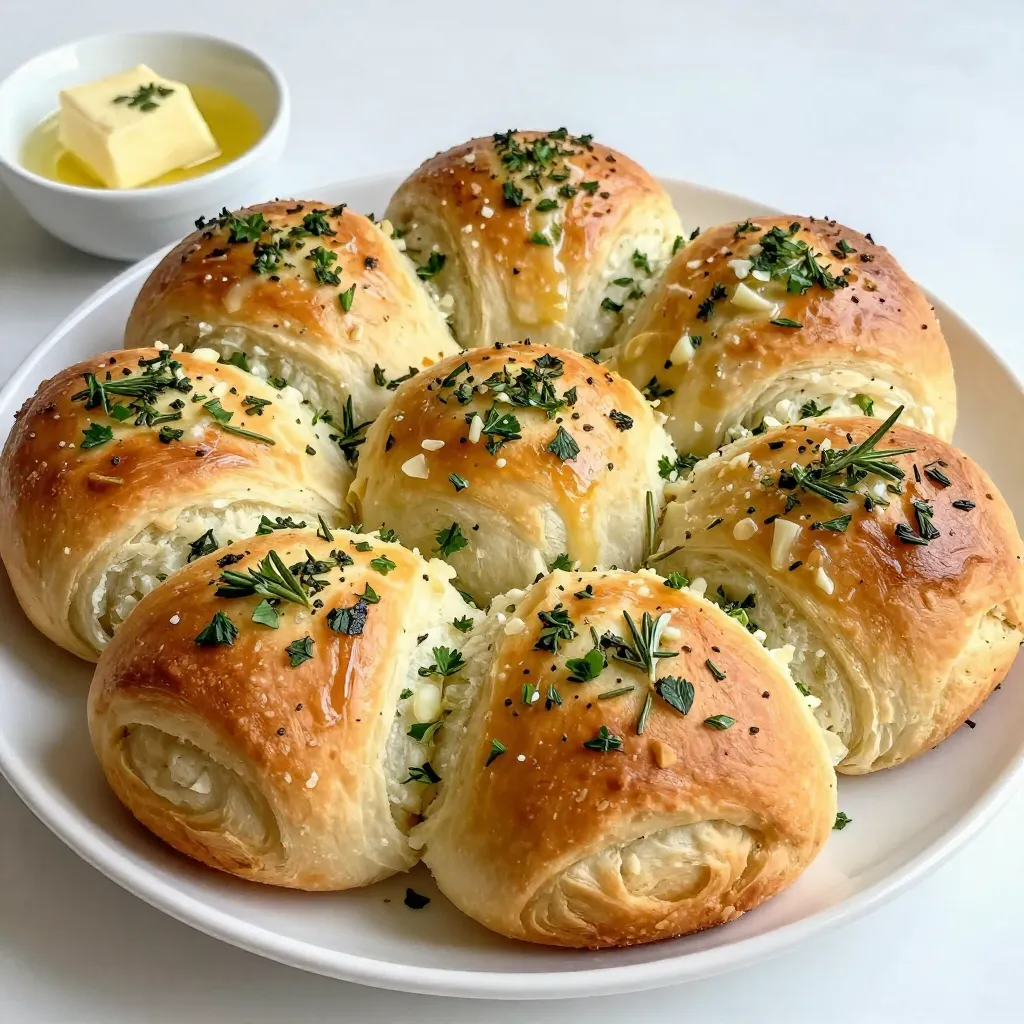
If you crave soft, flavorful rolls that complement any meal, you’re in the right place! My Garlic Herb Dinner Rolls combine all-purpose flour, fresh herbs, and garlic for an irresistible flavor. These rolls are easy to make, with simple ingredients and clear steps. Whether you’re a beginner or a seasoned baker, I’ll guide you through crafting these delightful treats. Ready to impress your family at the dinner table? Let’s get started!
Why I Love This Recipe
- Fresh Herb Flavor: The combination of parsley, rosemary, and thyme gives these rolls a vibrant and aromatic flavor that elevates any meal.
- Perfect for Any Occasion: These rolls are versatile enough to be served at family dinners, holiday gatherings, or even as a simple side for soups and salads.
- Easy to Make: This recipe is beginner-friendly with straightforward steps, making it accessible for anyone looking to try their hand at baking.
- Golden Brown Perfection: The egg wash gives the rolls a beautiful golden color, making them as visually appealing as they are delicious.
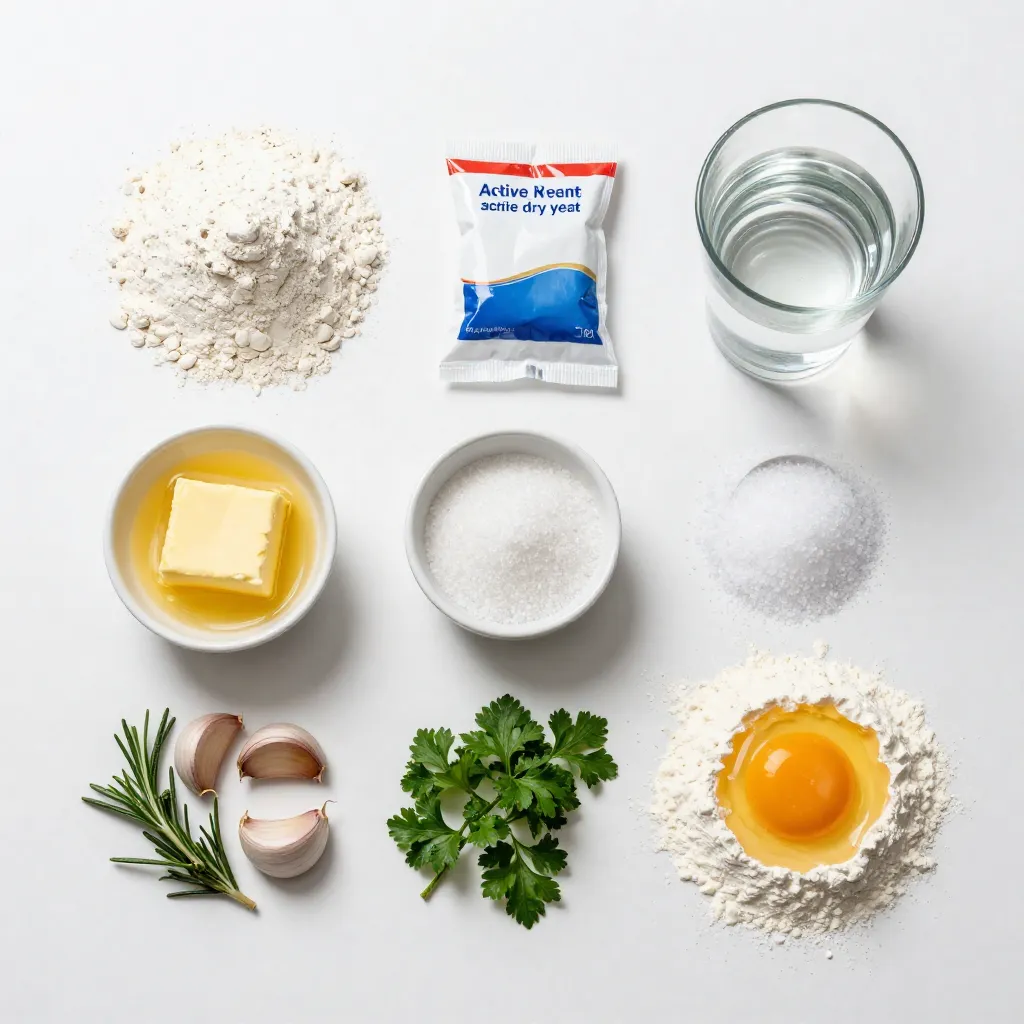
Ingredients
List of Ingredients
– 3 cups all-purpose flour
– 1 packet (2 1/4 teaspoons) active dry yeast
– 1 cup warm water (approximately 110°F)
– 2 tablespoons granulated sugar
– 1 teaspoon kosher salt
– 1/4 cup unsalted butter, melted
– 3 cloves garlic, finely minced
– 1 tablespoon fresh parsley, chopped
– 1 tablespoon fresh rosemary, chopped
– 1 tablespoon fresh thyme, chopped
– 1 egg (for egg wash)
– Extra flour, for dusting
To make garlic herb dinner rolls, you need simple yet fresh ingredients. Start with all-purpose flour, which gives the roll its soft texture. Active dry yeast helps the rolls rise and become fluffy. Warm water activates the yeast, while granulated sugar feeds it. Kosher salt balances the flavor. Unsalted butter adds richness.
Garlic is the star flavor in these rolls. Use fresh cloves, minced finely for the best taste. Fresh herbs like parsley, rosemary, and thyme bring bright notes. An egg wash gives the rolls a lovely golden color when baked. Lastly, keep extra flour handy for dusting your work surface as you knead the dough.
Step-by-Step Instructions
Activating the Yeast
To start, mix warm water and sugar in a small bowl. Use water around 110°F for the best results. Sprinkle in the active dry yeast and stir gently. Let this sit for about 5 to 10 minutes. You will know the yeast is ready when it becomes frothy. This froth means the yeast is active and ready to help your rolls rise.
Mixing and Kneading the Dough
Next, take a large mixing bowl. In it, whisk together the all-purpose flour and kosher salt. Create a well in the center of the flour mixture. Pour in the melted butter and the frothy yeast mix. Add the minced garlic too. Stir this mixture until it starts to form a shaggy dough. Transfer the dough to a floured surface. Knead it for about 5 to 7 minutes. The goal is to have a smooth and elastic dough. If it sticks, sprinkle a little extra flour on your hands or the surface.
Incorporating Herbs and First Rise
Once your dough is smooth, it’s time to add flavor. Mix in the chopped parsley, rosemary, and thyme. Knead the dough until the herbs are evenly spread throughout. After that, form the dough into a ball. Place it in a lightly greased bowl. Cover it with a kitchen towel and let it rise in a warm place for about 1 hour. The dough should double in size.
Shaping, Second Rise, and Preheating
After the first rise, gently punch down the dough to release trapped air. Now, divide the dough into 12 equal pieces. Shape each piece into a round ball and place them on a greased baking sheet. Make sure to leave space between them for rising. Cover these shaped rolls with a clean towel and let them rise for another 30 minutes. While they rise, preheat your oven to 375°F (190°C).
Baking the Rolls
Before baking, prepare the egg wash. Beat the egg in a small bowl and then use a pastry brush to coat the tops of the rolls. This will give them a nice golden color. Place the rolls in the preheated oven and bake for 15 to 20 minutes. Keep an eye on them. They should be golden brown and sound hollow when tapped on the bottom. Once done, take them out and let them cool slightly. Enjoy your warm garlic herb dinner rolls!
Tips & Tricks
Perfecting Flavor Combinations
To make your rolls even better, add more herbs. You can try basil, oregano, or even chives. Each herb gives a unique taste. Adjust the garlic too. If you love garlic, add more cloves. If you prefer a milder flavor, use fewer cloves. This way, you can customize your rolls just how you like them.
Common Mistakes to Avoid
One mistake is over-kneading the dough. Knead just until it’s smooth. If you knead too much, the rolls can become tough. Another mistake is under- or over-rising the dough. Dough that isn’t risen enough will be dense. If it rises too long, it may collapse. Keep an eye on the dough during its rise times.
Best Serving Suggestions
These rolls pair well with many dishes. Serve them with soups, salads, or pasta. They also work great with roasted meats. For a nice touch, arrange the rolls on a rustic board. Add a bowl of melted herb-infused butter for dipping. This makes for an inviting presentation at your table.
Pro Tips
- Perfect Temperature: Ensure your water is at the right temperature (approximately 110°F) to activate the yeast effectively without killing it.
- Flour Adjustment: Depending on humidity, you may need to adjust the flour slightly. Add more flour if the dough is too sticky or a little water if it’s too dry.
- Herb Variations: Feel free to experiment with different herbs or add some grated cheese for a unique flavor twist!
- Storage Tips: Store leftover rolls in an airtight container at room temperature for up to 2 days or freeze for longer storage!
Variations
Cheese-Filled Dinner Rolls
You can add cheese to your dinner rolls for extra flavor. Mozzarella or cheddar works well. To fill the rolls, flatten the dough a bit. Place a small chunk of cheese in the center. Then, fold the dough over the cheese and shape it into a ball. This method keeps the cheese melted inside. You may need to adjust the baking time. Start checking them at 15 minutes. If they need more time, bake for an extra 2 to 5 minutes.
Gluten-Free Option
For a gluten-free version, swap the all-purpose flour with a gluten-free blend. Look for a blend with xanthan gum for best results. Use 3 cups of the gluten-free flour mix for the recipe. The texture might differ. Be careful not to over-knead the dough. It can become tough easily. Let the dough rise in a warm spot for the same time as regular rolls. This will help it become light and fluffy.
Herb Variations
Feel free to change the herbs in your rolls. You can use dried herbs like oregano or basil instead of fresh herbs. Just remember, dried herbs have a stronger flavor. Use about one-third of the amount compared to fresh. You can also try adding spices like crushed red pepper or garlic powder for extra zing. These small changes can make the rolls unique and fun!
Storage Info
Best Storage Practices
To keep your garlic herb dinner rolls fresh, store them in airtight containers. This helps prevent them from drying out. You can also wrap them in plastic wrap or foil. If you plan to eat them within a few days, keep them at room temperature. For longer storage, place them in the fridge. This will keep them fresh for about a week.
Reheating Instructions
When reheating, I suggest using the oven for the best results. Preheat the oven to 350°F (175°C) and place the rolls on a baking sheet. Heat them for about 10 minutes. This method keeps them soft and warm. If you’re in a hurry, you can use the microwave. Wrap the rolls in a damp paper towel and heat for 15-20 seconds. However, this may make them a bit chewy. Always keep the rolls covered while reheating to keep them fresh.
FAQs
How can I make these dinner rolls vegan?
To make garlic herb dinner rolls vegan, you can swap the butter for a plant-based option. Use coconut oil or vegan butter in equal amounts. For the egg wash, replace it with a mixture of almond milk and a bit of maple syrup. This will give a nice shine to your rolls without using eggs.
Can I freeze garlic herb dinner rolls?
Yes, you can freeze garlic herb dinner rolls! You can freeze them before or after baking. If you freeze them before baking, shape the rolls and place them on a baking sheet. Freeze until solid, then transfer them to a freezer bag. For after baking, let them cool completely, then wrap in plastic wrap and place in a bag.
To thaw, remove the rolls from the freezer and let them sit at room temperature for about 1-2 hours. If frozen before baking, you can bake them from frozen. Just add a few extra minutes to the baking time.
What can I serve with garlic herb dinner rolls?
Garlic herb dinner rolls pair great with many dishes. They are perfect with soups like minestrone or creamy tomato. They also complement roasted meats, such as chicken or beef.
For salad pairings, try a fresh Caesar salad or a simple garden salad. The rolls add a nice touch to any meal and make it feel special.
In this blog post, we covered how to make garlic herb dinner rolls. You learned about the key ingredients, how to activate yeast, and knead the dough. We also explored ways to shape the dough and bake these delicious rolls. Plus, we shared handy tips, common mistakes to avoid, and tasty variations to try.
These rolls are a perfect side for many meals. I hope you enjoy making them and sharing with others. Happy bakin