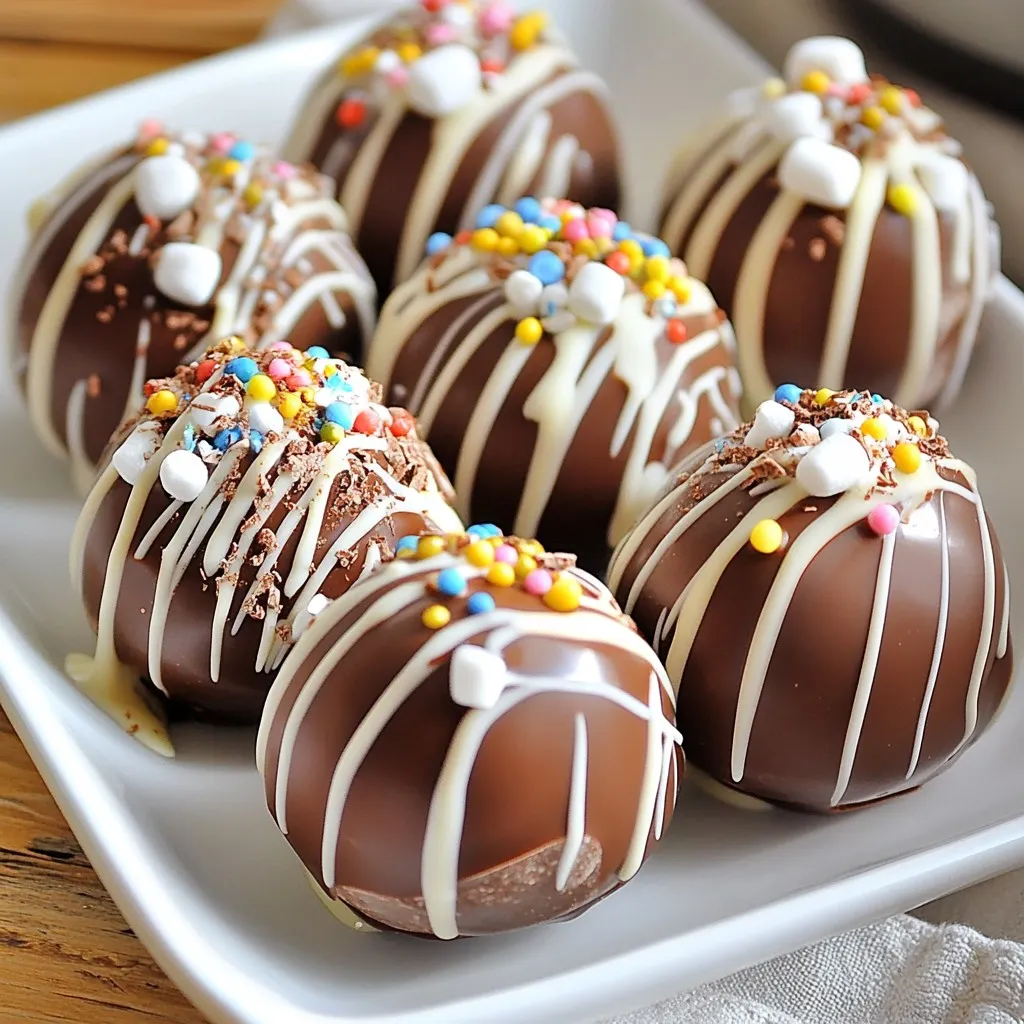
Hot chocolate bombs are the cozy treats you need this winter! With a delightful explosion of chocolate and marshmallows, they turn any cup of milk into a magical experience. In this guide, I’ll share the ingredients, steps, and tips to create your own perfect bombs at home. Whether you seek classic flavors or trendy twists, I’ve got you covered. Let’s make your winter warm and sweet with hot chocolate bombs!
Why I Love This Recipe
- Indulgent Flavor: The combination of rich milk chocolate and creamy white chocolate creates a decadent hot chocolate experience that is simply irresistible.
- Fun to Make: These hot chocolate bombs are a delightful project to create with friends or family, making the process as enjoyable as the end result.
- Customizable: With options for sprinkles and various fillings, you can tailor each bomb to your taste, ensuring a unique treat every time.
- Perfect for Gifting: These beautifully crafted hot chocolate bombs make for a thoughtful and delicious gift during the colder months, sure to bring smiles.
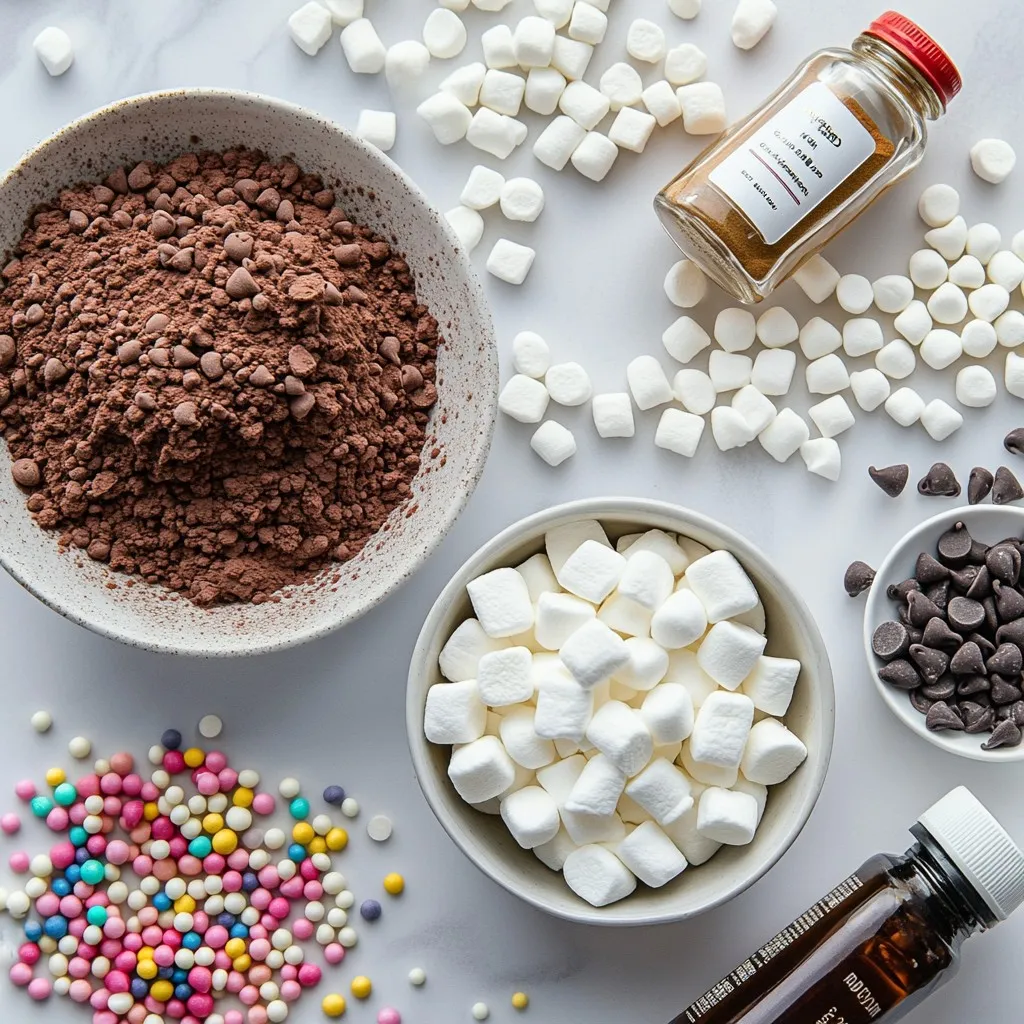
Ingredients
Essential Ingredients for Hot Chocolate Bombs
To make hot chocolate bombs, you need a few key items:
– 1 cup milk chocolate chips
– 1 cup white chocolate chips
– 1/2 cup cocoa powder
– 1/2 cup mini marshmallows
– 1/4 cup sprinkles (optional)
– 1/2 teaspoon vanilla extract
These ingredients create a rich and creamy drink. The milk chocolate and white chocolate give great flavor and texture.
Optional Flavor Enhancements
There are many ways to add unique flavors to your bombs. Consider these options:
– Peppermint extract for a minty twist
– Caramel sauce for a sweet touch
– Cinnamon for a warm spice
– Nutmeg for a cozy flavor
Each addition can change the taste. So, feel free to mix and match!
Recommended Tools and Equipment
To create your hot chocolate bombs, gather these tools:
– Microwave-safe bowl for melting chocolate
– Silicone sphere mold for shaping
– Spoon for spreading chocolate
– Refrigerator for setting the shells
– Heat-safe plate to smooth edges
Having the right tools makes the process easier. It helps you create perfect bombs every time!
Step-by-Step Instructions
Melting the Chocolate
To start, grab a microwave-safe bowl and add one cup of milk chocolate chips. Heat them in the microwave. Set the timer for 30 seconds. After the time is up, stir the chocolate. Repeat this until it is smooth and fully melted. Be careful! If you heat it too long, the chocolate can burn.
Molding the Chocolate Shells
Next, take a silicone sphere mold. Pour about one tablespoon of the melted chocolate into each half of the mold. Use the back of a spoon to coat the sides evenly. Make sure every part is covered. Once done, place the molds in the fridge for 10 to 15 minutes. This will help the chocolate set.
After the first layer is hard, you may need to melt more chocolate. Pour another layer into each mold. Again, use a spoon to spread it evenly. Return the molds to the fridge for another 10 to 15 minutes. This makes a strong chocolate shell.
Filling and Sealing the Bombs
Now it’s time to fill the bombs! Take half of the chocolate shells out of the molds. Add cocoa powder to each shell, followed by mini marshmallows. If you like, sprinkle some colorful sprinkles on top. Drizzle a little melted white chocolate over this mix. This will help hold the top shell in place.
Take the other half of the chocolate shells and press them onto the filled ones. Make sure they fit well together. Use the remaining melted white chocolate as glue to seal the bombs. Hold them for a moment until the chocolate starts to set.
Now you’re ready to enjoy the magic of hot chocolate bombs!
Tips & Tricks
How to Achieve Perfectly Smooth Chocolate
To get smooth chocolate, start with good quality chips. I prefer milk chocolate for flavor. Microwave the chips slowly, in 30-second bursts. Stir after each round until the chocolate melts. This keeps it from burning. If it looks thick or grainy, add a teaspoon of vegetable oil. This helps it shine and flow better.
Ensuring a Secure Seal on Your Bombs
A secure seal keeps the filling inside. Use melted white chocolate as glue. After filling one half, gently press the top half on. Make sure they align well. You can hold them for a few seconds to let them stick. If you find gaps, add more melted chocolate to seal them up.
Ideas for Presentation and Serving
Presentation is key to wow your guests. I love to drizzle more melted white chocolate on top. Add colorful sprinkles for fun. You can even use edible glitter for a festive touch. Serve in clear mugs to show off the magic inside. When you pour hot milk over the bomb, watch it melt and reveal the treats. It’s a delightful show for everyone!
Pro Tips
- Use High-Quality Chocolate: Opt for high-quality chocolate chips for a richer flavor and smoother texture in your hot chocolate bombs.
- Chill Between Layers: Make sure to chill the chocolate layers thoroughly between applications to ensure a sturdy shell that won’t break easily.
- Customize Fillings: Feel free to experiment with different fillings such as crushed cookies, flavored marshmallows, or even small candies for a unique twist.
- Presentation Matters: For a stunning presentation, use colorful sprinkles and drizzle additional melted chocolate on top before serving.
Variations
Flavor Variations (Mint, Caramel, etc.)
You can make hot chocolate bombs in many flavors. Mint is a popular choice. Just add mint extract to the melted chocolate. For a caramel twist, use caramel sauce inside the bombs. You can also try other flavors like orange, mocha, or raspberry. Each flavor brings its own fun taste. Mixing flavors can make it even more exciting!
Decorative Ideas for Special Occasions
Decorating hot chocolate bombs adds fun. For holidays, use colored sprinkles that match the theme. You can drizzle colored chocolate over the bombs for more flair. If it’s a birthday, add edible glitter for sparkle! You can even use themed molds, like hearts for Valentine’s Day. Each decoration can make your hot chocolate bombs unique and special.
Alternative Fillings (Peanut Butter, Hazelnut, etc.)
You can switch up the fillings to surprise everyone. Peanut butter adds a creamy, nutty taste. Just spoon a little into the bomb before sealing. Hazelnut spread is another great choice. You can also use crushed cookies or toffee bits for crunch. Be creative with your fillings to find your favorite mix!
Storage Info
Best Practices for Storing Hot Chocolate Bombs
Store your hot chocolate bombs in an airtight container. This keeps them fresh and safe. A cool, dry place works best. Avoid places with high heat or humidity. Too much moisture can cause the chocolate to bloom. Blooming makes the chocolate look dull and less tasty.
How Long Do They Last?
Hot chocolate bombs can last up to two weeks when stored properly. If you keep them in the fridge, they may last a bit longer. Always check for any signs of spoilage before use. If they look or smell off, it’s best to throw them away.
Tips for Freezing Hot Chocolate Bombs
You can freeze hot chocolate bombs to enjoy later. Wrap each bomb in plastic wrap. Then, place them in a freezer-safe bag. They can last for up to three months in the freezer. When ready to use, let them sit at room temperature for about 30 minutes before serving. This helps them warm up and makes for a great treat.
FAQs
How to Make Hot Chocolate Bombs From Scratch?
To make hot chocolate bombs, gather your ingredients:
– 1 cup milk chocolate chips
– 1 cup white chocolate chips
– 1/2 cup cocoa powder
– 1/2 cup mini marshmallows
– 1/4 cup sprinkles (optional)
– 1/2 teaspoon vanilla extract
Start by melting the milk chocolate chips in the microwave. Use short bursts of 30 seconds. Stir after each burst until smooth. Be careful not to burn the chocolate. Pour the melted chocolate into a silicone sphere mold. Cover the inside with a spoon. Chill in the fridge for 10-15 minutes until hard. Repeat for a second layer.
Next, fill half of the chocolate shells with cocoa powder, mini marshmallows, and sprinkles. Drizzle melted white chocolate on top. Press the other half of the shells onto the filled ones. Use the white chocolate to seal them well. Chill again if needed. Finally, decorate with more white chocolate and sprinkles.
Can You Use Different Types of Chocolate?
Yes, you can use different types of chocolate. Dark chocolate, milk chocolate, or even white chocolate works well. Each type gives a unique taste. Mixing chocolates can add depth to your hot chocolate bombs. Try flavored chocolates like caramel or mint for fun twists.
Where to Buy Pre-Made Hot Chocolate Bombs?
You can find pre-made hot chocolate bombs at local stores or online. Many bakeries sell them during winter. Check out specialty shops or online marketplaces like Etsy. You can also find them on sites like Amazon. Look for brands that focus on quality ingredients for the best taste.
Making hot chocolate bombs is simple and fun. We covered essential ingredients and optional flavors. You learned how to melt chocolate, mold shells, and securely seal the bombs. Tips helped you achieve smooth chocolate and present your treats nicely. We’ve explored tasty variations and how to store your bombs for freshness. Use this guide to impress your friends and enjoy delicious drinks. You now have the tools to make your hot chocolate bombs unique and tasty! Enjoy your sweet adventure