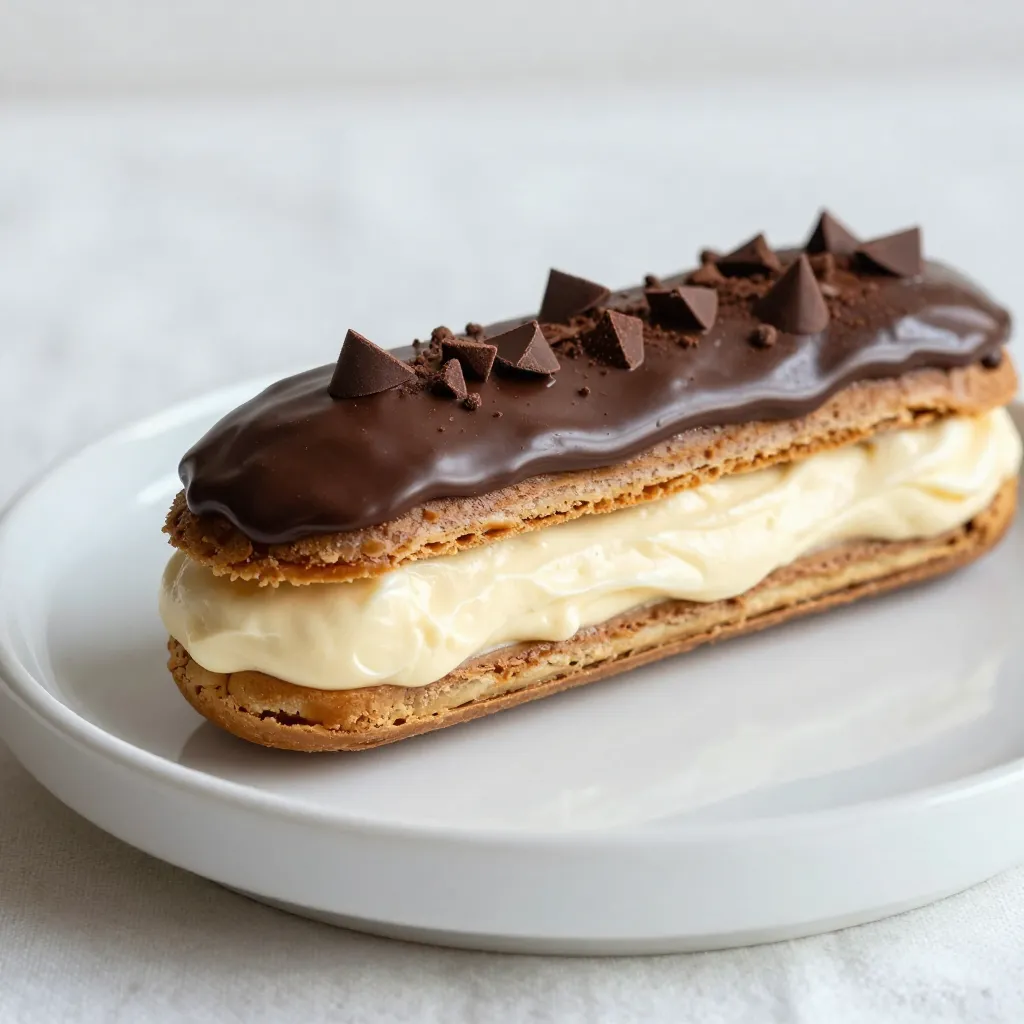
Are you ready for a dessert that’s both easy to make and incredibly delicious? This No-Bake Chocolate Eclair Cake is your answer. You don’t need to worry about baking or complicated steps. With simple ingredients and quick instructions, you can impress your friends and family without a fuss. Let’s dive into the tasty world of this delightful cake, where chocolate meets creamy goodness in every layer!
Why I Love This Recipe
- Easy to Make: This dessert requires minimal prep time and only a few ingredients, making it a breeze to whip up for any occasion.
- No Baking Required: With no oven time involved, it’s perfect for hot days or when you want a quick dessert without the heat.
- Layers of Flavor: The combination of creamy vanilla pudding, chocolate glaze, and graham crackers creates a delightful texture and taste experience.
- Perfect for Sharing: With twelve generous servings, this cake is ideal for gatherings, parties, or simply to share with family and friends.
Ingredients
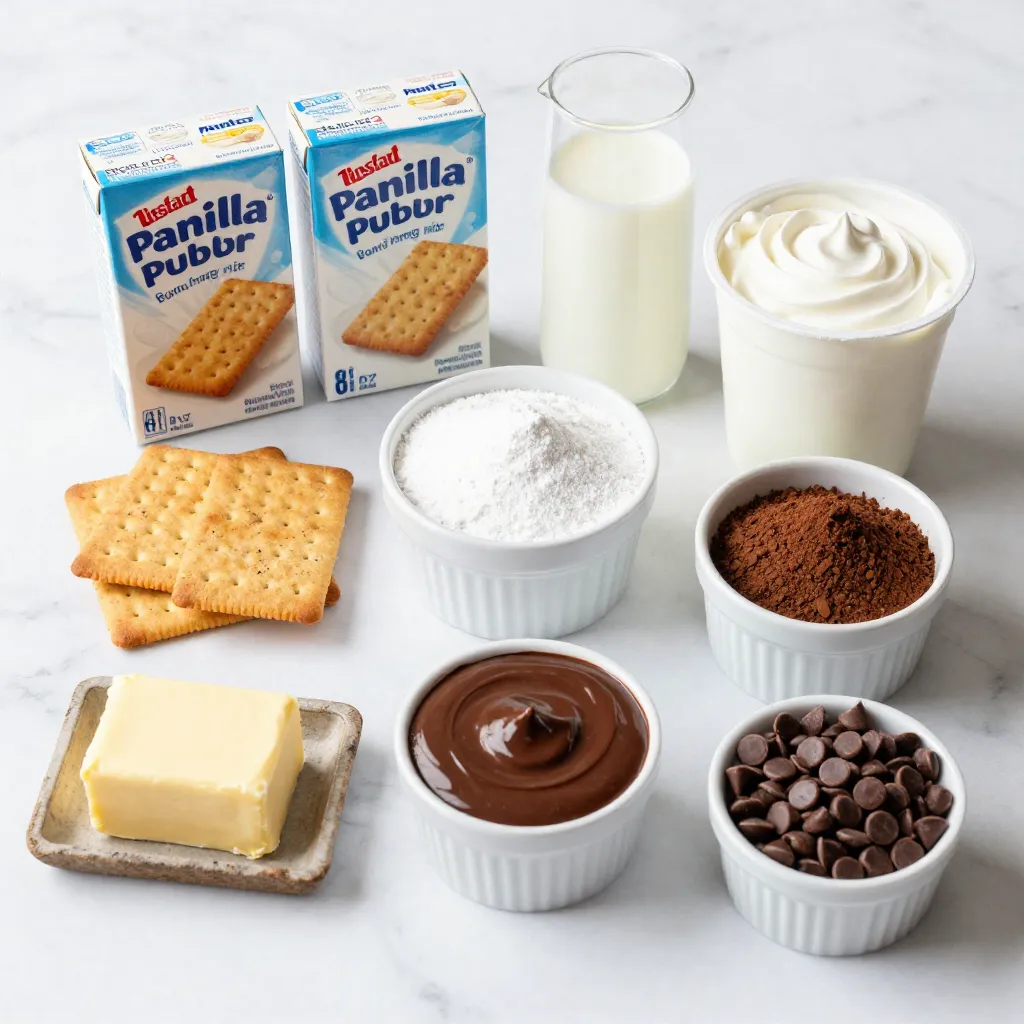
Complete Ingredients List
To make this No-Bake Chocolate Eclair Cake, you will need the following ingredients:
– 1 box of graham crackers
– 2 boxes (3.4 oz each) instant vanilla pudding mix
– 4 cups milk
– 1 container (8 oz) whipped topping (like Cool Whip)
– 1 cup powdered sugar
– 1/2 cup unsweetened cocoa powder
– 1/2 cup milk (for the chocolate glaze)
– 1/4 cup unsalted butter
– 1 cup chocolate chips
Measurement Conversions
If you need to convert measurements, here are some tips:
– 1 cup = 8 ounces
– 1/2 cup = 4 ounces
– 1/4 cup = 2 ounces
– 1 box of pudding mix (3.4 oz) is about 0.21 pounds
These conversions help if you use different measuring tools or need to adjust the recipe.
Alternative Ingredient Suggestions
You can swap some ingredients for different flavors or dietary needs:
– Instead of graham crackers, try vanilla wafers or chocolate cookies.
– Use almond milk or oat milk for a dairy-free option.
– If you want less sugar, use a sugar substitute for the powdered sugar.
– For a richer flavor, add a splash of vanilla extract to the pudding mix.
These swaps can make your dessert fit your tastes or dietary choices without losing its charm.
Step-by-Step Instructions
Preparation of the Pudding Mixture
Start by grabbing a large mixing bowl. Add the two boxes of instant vanilla pudding mix. Next, pour in 4 cups of milk. Whisk the mixture for 2-3 minutes until smooth. It should thicken nicely. Once it’s thick, fold in 1 cup of whipped topping. Use a spatula and be gentle to keep it fluffy.
Layering the Graham Crackers
Now, take a 9×13 inch baking dish. Lay down a single layer of graham crackers. Make sure they overlap a bit. This helps hold everything together. Spoon half of the pudding mixture over the crackers. Spread it evenly with your spatula. Next, add another layer of graham crackers on top. Then, spread the rest of the pudding mixture over this layer. Finish with one more layer of graham crackers.
Making and Applying the Chocolate Glaze
In a medium saucepan, combine chocolate chips, cocoa powder, butter, and ½ cup of milk. Set the heat to medium. Stir the mixture constantly until it’s smooth and glossy. This will create a rich chocolate glaze. Once ready, drizzle the warm glaze over the top layer of graham crackers. Make sure to cover it completely.
Chilling Time and Final Assembly
Spread the remaining whipped topping over the chocolate layer. Smooth it out gently with your spatula. Cover the dish tightly with plastic wrap. Place it in the fridge for at least 4 hours, or overnight. This chilling time helps the layers blend together perfectly. When you’re ready to serve, slice it into squares and enjoy the delightful layers!
Tips & Tricks
Achieving the Perfect Texture
To get a smooth texture, whisk the pudding mix and milk well. Whisk for 2-3 minutes until thick. When you fold in the whipped topping, do it gently. This keeps the mixture light and fluffy. Layer the graham crackers tightly, so they hold the pudding well.
Common Mistakes to Avoid
One common mistake is rushing the chilling time. Let the cake chill for at least 4 hours. This allows the layers to set. Another mistake is using too much cocoa powder in the glaze. Stick to 1/2 cup for the best flavor. Don’t skip the whipped topping on top. It adds a nice creaminess.
Enhancing Flavor and Presentation
For added flavor, try using different pudding flavors. You can use chocolate or butterscotch pudding. To make it look fancy, drizzle chocolate sauce on each slice. Sprinkling chocolate shavings adds a nice touch. A few fresh berries can brighten the plate too. Enjoy making this cake as a special treat!
Pro Tips
- Chill for Best Texture: Allow the cake to chill overnight for the best flavor and texture. The longer it sits, the more the flavors meld together.
- Graham Cracker Variations: Experiment with flavored graham crackers, such as chocolate or honey, to add a unique twist to the traditional flavor profile.
- Make Ahead: This dessert can be made a day or two in advance, making it a perfect option for parties or gatherings.
- Presentation Matters: For an elegant finish, consider garnishing with fresh berries or a sprinkle of cocoa powder before serving.
Variations
Flavor Swaps
You can easily switch the pudding flavor in this cake. Use chocolate pudding for a rich taste. If you love fruit, try banana or strawberry pudding. Each flavor adds a unique twist. Mix and match to find your favorite combo. The options are endless!
Healthier Option Substitutions
Want a lighter version? Use low-fat or almond milk instead of regular milk. You can also swap the whipped topping for Greek yogurt. Choose whole grain graham crackers for extra fiber. These small changes keep the taste while cutting calories.
Seasonal Variations for Special Occasions
For holidays, add seasonal flavors to your cake. In fall, use pumpkin spice pudding. During summer, mix in fresh berries between layers. For winter, peppermint extract can give a festive touch. These ideas make your dessert fun and special for any event.
Storage Info
Best Practices for Storing Leftovers
Store any leftover No-Bake Chocolate Eclair Cake in the fridge. Keep it in an airtight container. This helps keep it fresh and tasty. You can also cover it tightly with plastic wrap. Make sure it is sealed well. Leftovers stay good for up to 3 days. After that, the texture may change.
Freezing Guidelines for Long-Term Storage
If you want to save some for later, you can freeze it. First, slice the cake into pieces. Then, wrap each piece in plastic wrap. Place the wrapped pieces in a freezer-safe container. This way, they stay protected from freezer burn. You can freeze the cake for up to one month. When you’re ready to eat it, take it out of the freezer.
How to Reheat or Serve After Storage
To serve, let the cake thaw in the fridge overnight. This keeps it from getting too soft. For a warm treat, you can microwave a slice for about 10-15 seconds. Be careful not to heat it too long. This dessert tastes best chilled, so serving it cold is ideal. Enjoy it as a sweet ending to any meal!
FAQs
Can I use homemade whipped cream instead of Cool Whip?
Yes, you can use homemade whipped cream. It adds a fresh taste. Just whip heavy cream until soft peaks form. Sweeten it with powdered sugar to match the Cool Whip flavor. Use the same amount as in the recipe. Your cake will taste amazing!
How long can I leave the cake out at room temperature?
You can leave this cake out for about two hours. After that, it should go back in the fridge. If it’s hot outside, keep it cool. This helps keep the flavors fresh and safe to eat!
What should I do if my chocolate glaze is too thick?
If your glaze is too thick, add more milk. Start with one tablespoon at a time. Stir well until you reach the right consistency. The glaze should be smooth and pourable for a nice finish on your cake.
Can this cake be made in advance for an event?
Absolutely! This cake is perfect for making ahead of time. You can make it a day before your event. Just keep it in the fridge. The flavors blend well, and it tastes even better after chilling.
We explored the key components to create a tasty dessert. You learned about ingredients, step-by-step preparations, and helpful tips. Variations can suit any taste or occasion. Remember to store leftovers properly to keep them fresh. With these insights, you can make a delightful dessert for any gathering. Enjoy your cooking journey, and don’t hesitate to experiment with what you learne